First question I get about Azure Data Studio is; Why do we need another application when we have SSMS? There have been very big changes in SQL Server lately. For example, version 2017 and later can run in Linux, 2019 brought us Big Data Clusters, Azure version brings SQL Edge which lets SQL Server run in ARM devices. SQL Server can run in many platforms which is a great news but SSMS can run only in Windows platform. Microsoft needed to make SSMS work in different platforms or develop a new tool to handle multi-platform problem. This is one of the main reasons we have a new tool which can run in multi-platforms. Also; It has new modern features like Notebooks which I am going to cover here.
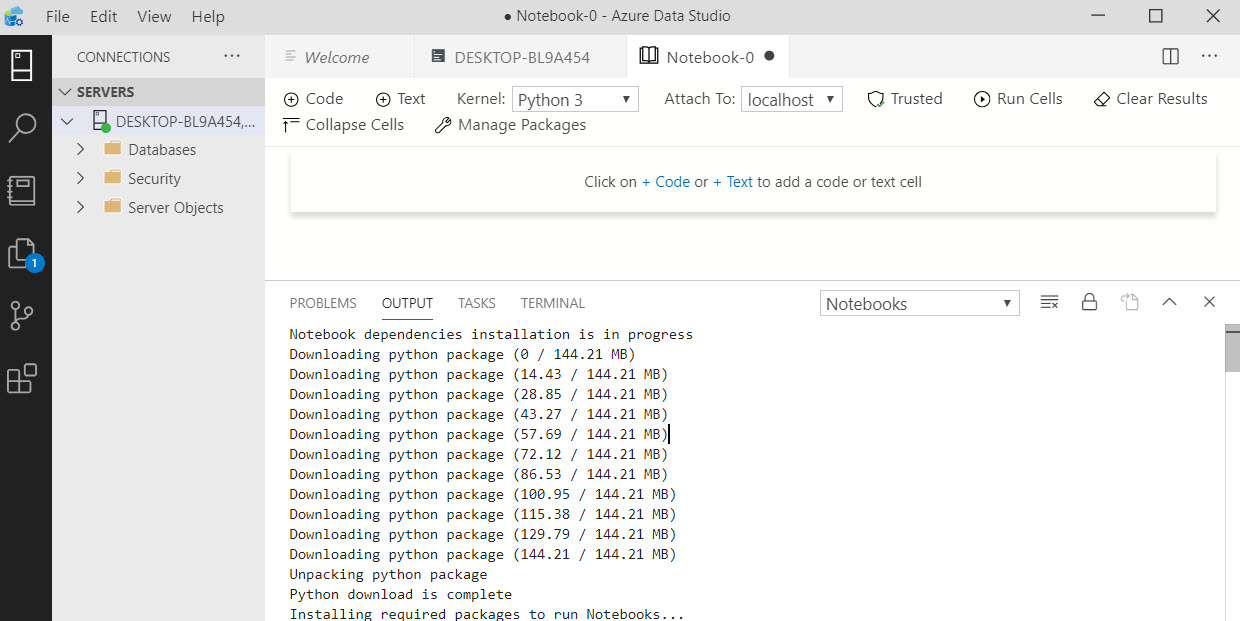
Azure Data Studio has a great feature named Notebooks. It works just like Jupiter Notebooks and supports T-SQL. In this post, I will show you how to install and query SQL Server database by using Python 3 Kernel. To open the notebooks, right click on a database and click on New Notebook.
Pick the new installation and click on Install. Application will download all the required files and install the required files. When it's done with that, It will check if any of Python packages/modules need update.
To see which packages are installed, click on the Manage Packages. You can use this option to update current Python packages or Install new ones. We need to have ODBC driver package (pyodbc) to query SQL Database by using Python.
I searched by the name of the package and click on Install to use this module in my notebook.
I am ready to write python to query a SQL Database in Azure Data Studio now. First, you need to figure out which ODBC driver you like to use. You can find installed ODBC Drivers in the ODBC Data Source Administration.
I used the pyodbc module to connect to SQL Server. I need to pass a connection string to use this module, so I created a variable for my connection string and passed it to the odbc module. After I create the connection, I passed my second variable which contains my T-SQL query to execute by using this connection. While loop displays values of first two columns.
import pyodbc cstring = 'DRIVER=ODBC Driver 17 For SQL Server;Server=DESKTOP-BL9A454;DATABASE=StackOverflow2010;Trusted_Connection=yes' tsql ='SELECT TOP 100 Id, AnswerCount FROM Posts' conn = pyodbc.connect(cstring) cursor = conn.cursor() cursor.execute(tsql) row = cursor.fetchone() while row: print(str(row[0]) + " " + str(row[1])) row = cursor.fetchone()
This code returns the following data for me.


Great blog!! Thanks for sharing
ReplyDeleteSQL Azure Online Training
Azure SQL Training
SQL Azure Training
Any reason for not using OLEDB (cf. ODBC)?
ReplyDeleteStraigh and simple, I love it. Thank you
ReplyDelete